This is the second article of the slim 3 framework tutorial. In my previous article we have successfully downloaded slim 3 framework and worked with routes and templates.
If you directly land on this page just to understand how to access database in slim 3 then this tutorial is for you. But if you want to develop website using slim 3 then please also read my previous post for better understanding.
Also read: Slim 3 Framework Tutorial: Download, Setup, Create Routes and Template
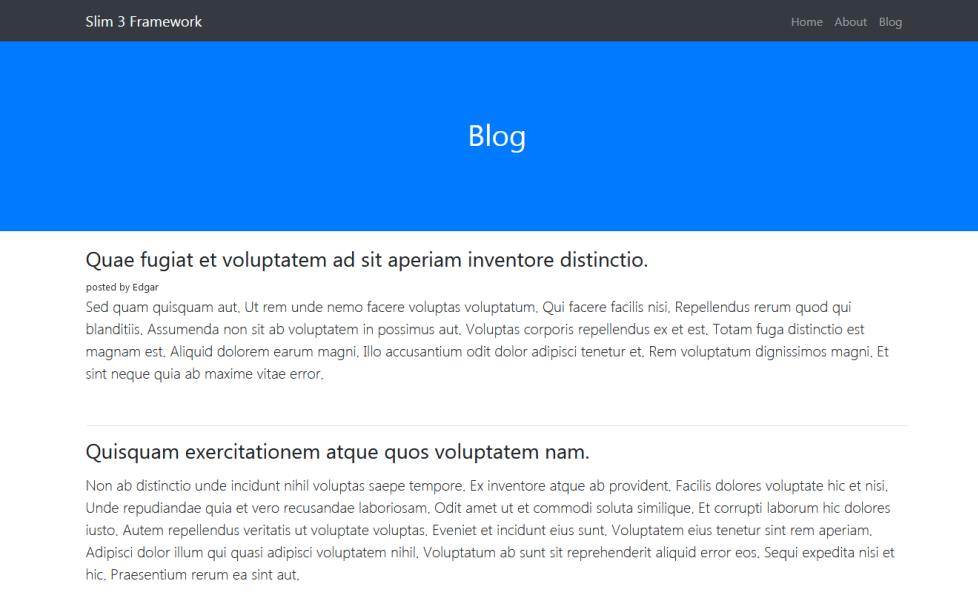
In this slim 3 framework tutorial I am going to configure and access database. We already created home page and about page in our previous post. In this post I will create blog listing page and show records from database.
Create, Configure, Load and Access Database in Slim 3 Framework:
Following are the step by step process of how we will create blog page.
- Create database as demo
- Create database table as blog with 5 fields (id, title, blog_content, author, created).
- Create db index with host, user, password and database name in
/src/settings.php - Create database connection index.php using
- Create route for the blog page in
/src/routes.php. - Get records from database by using query in blog route.
- Pass fetched record to the front template and display them using loop.
Create Database:
|
1 2 3 4 |
Create database demo; Use demo; |
Create Database Table:
|
1 2 3 4 5 6 7 8 9 10 11 12 |
CREATE TABLE `blog` ( `id` INT(11) NOT NULL AUTO_INCREMENT, `title` VARCHAR(255) NULL DEFAULT NULL, `blog_content` TEXT NULL, `author` VARCHAR(50) NULL DEFAULT NULL, `created` DATETIME NULL DEFAULT NULL, PRIMARY KEY (`id`) ) ENGINE=InnoDB ; |
Set Database Variable in settings.php:
|
1 2 3 4 5 6 7 8 9 10 11 12 13 14 15 16 17 |
<?php return [ 'settings' => [ 'displayErrorDetails' => true, // set to true in production 'addContentLengthHeader' => false, 'db' =>[ 'host'=> 'localhost', 'user'=> 'root', 'password'=> '', 'database'=> 'demo', ] ], ]; |
Database Connection in index.php:
This is a beginner tutorial so I am using mysqli class to access database but it is better to use PDO.
|
1 2 3 4 5 6 7 |
$container['db'] = function($container){ $getSettings = $container->get('settings')['db']; $mysqli = new mysqli($getSettings['host'],$getSettings['user'],$getSettings['password'],$getSettings['database']); return $mysqli; }; |
Create Route for Blog:
|
1 2 3 4 5 6 7 8 9 10 11 12 13 14 15 16 17 18 19 |
$app->get('/blog',function(Request $request, Response $response, array $args){ $qry = "select * from blog"; $rs = $this->db->query($qry); while($row = $rs->fetch_assoc()){ $blogEntries[] = $row; } $data = array( "main_heading" => "Blog", "blog_entries" =>$blogEntries ); return $this->view->render($response, 'blog.php',$data); }); |
View Blog.php:
Blog.php file is located in templates folder.
|
1 2 3 4 5 6 7 8 9 10 11 12 13 14 15 16 17 18 19 20 21 22 23 24 25 26 27 28 29 30 31 32 33 34 35 |
<?php include('layouts/header.php');?> <header class="bg-primary text-white"> <div class="container text-center"> <h1><?php echo $main_heading; ?></h1> </div> </header> <section style="padding:20px;"> <div class="container"> <?php if(is_array($blog_entries) && count($blog_entries) > 0) { foreach($blog_entries as $singleEntry) { echo '<div class="row">'; echo '<div class="col-lg-12" >'; echo '<h3>'.$singleEntry['title'].'</h3>'; echo '<small> posted by '.$singleEntry['author'].'</small>'; echo '<p class="lead">'.$singleEntry['blog_content'].'</p>'; echo '<br>'; echo '</div>'; echo '</div>'; echo '<hr>'; } } ?> </div> </section> <?php include('layouts/footer.php');?> |


Got it. Alight did you also made on login/Signup with validation ?
No not yet. But soon i will create