XAMPP is one of the most popular PHP development environment available right now. Best thing about xampp is that it is completely free and it also includes MariaDB and Perl.
Apache friends recently develop XAMPP-VM for OS X users which serve as a virtual machine for OS X. In this tutorial we are going to download XAMPP-VM on OS X.
What is the difference between XAMPP for OS X and XAMPP-VM?
XAMPP for OS X is a native installer for OS X. It installs Apache, PHP and other XAMPP components directly on your OS X system, in the /Applications/XAMPP folder.
XAMPP-VM is a virtual machine for OS X. It includes Apache, PHP and other XAMPP components and runs them in a Linux-based virtual machine on your OS X system.
For more information, refer to the blog post at https://www.apachefriends.org/blog/new_xampp_20170628.html.
How to intall XAMPP-VM on Max OS X:
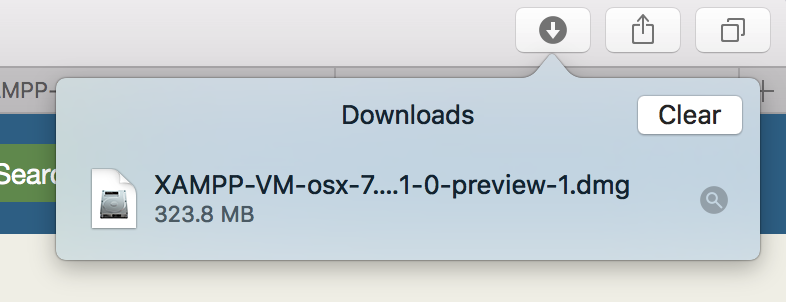
- Download XAMPP-VM for OS X from Apache Friends
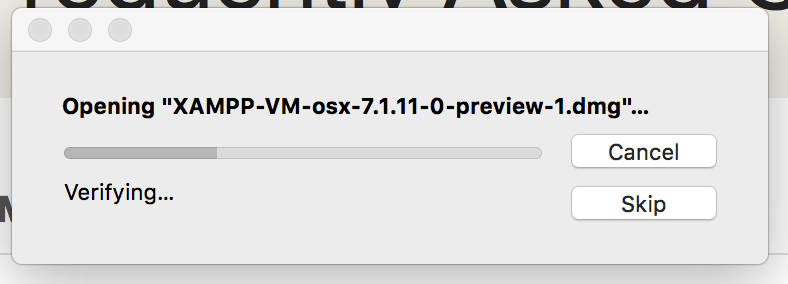
- Open dmf file and installation will start
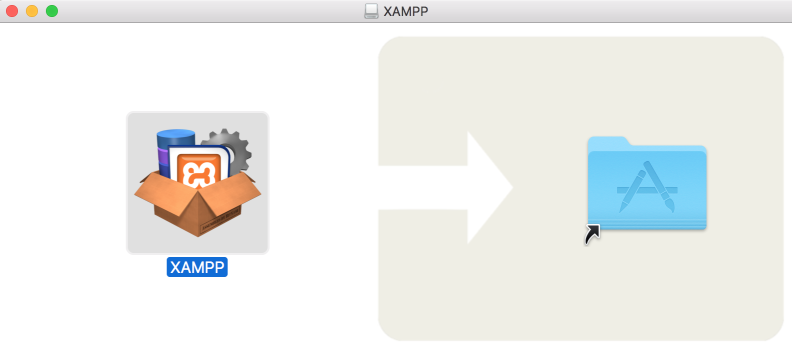
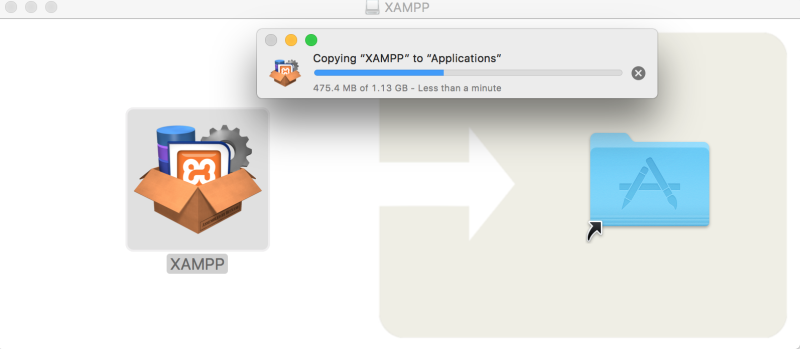
- Drag and Drop XAMPP folder to Application folder
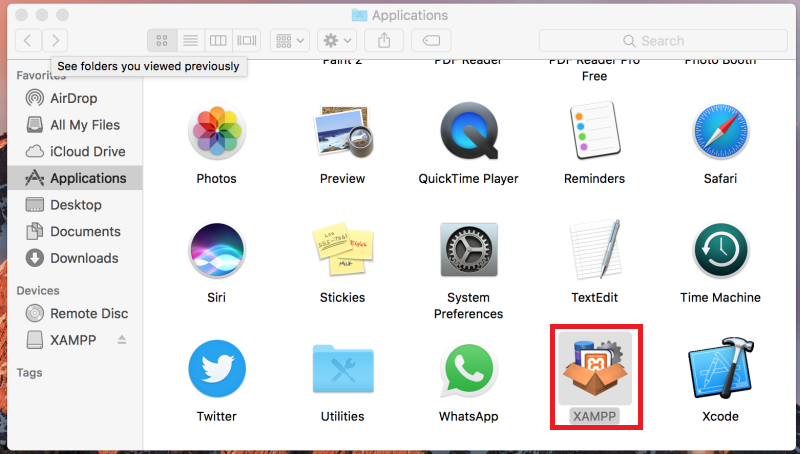
- Goto Application folder and click on XAMPP
- Dialogue box will open with the message (XAMPP is an application downloaded from the Internet. Are you sure you want to open it). Just click on Open
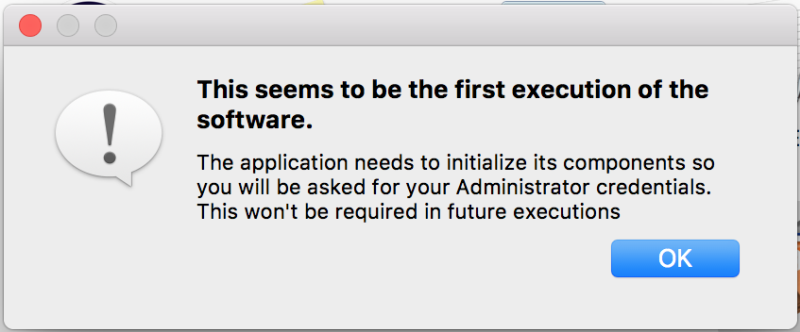
- Another dialogue box will open saying this seems to be the first execution of the software. Just click on OK.
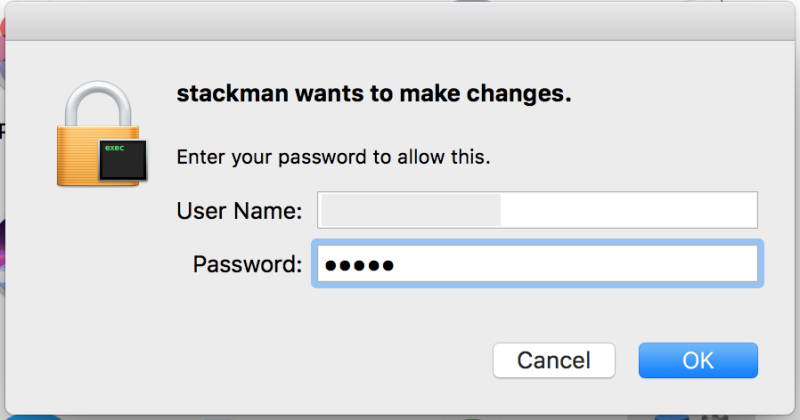
- Another dialogue box will open asking for system user name and password. Just type user name and password and click OK
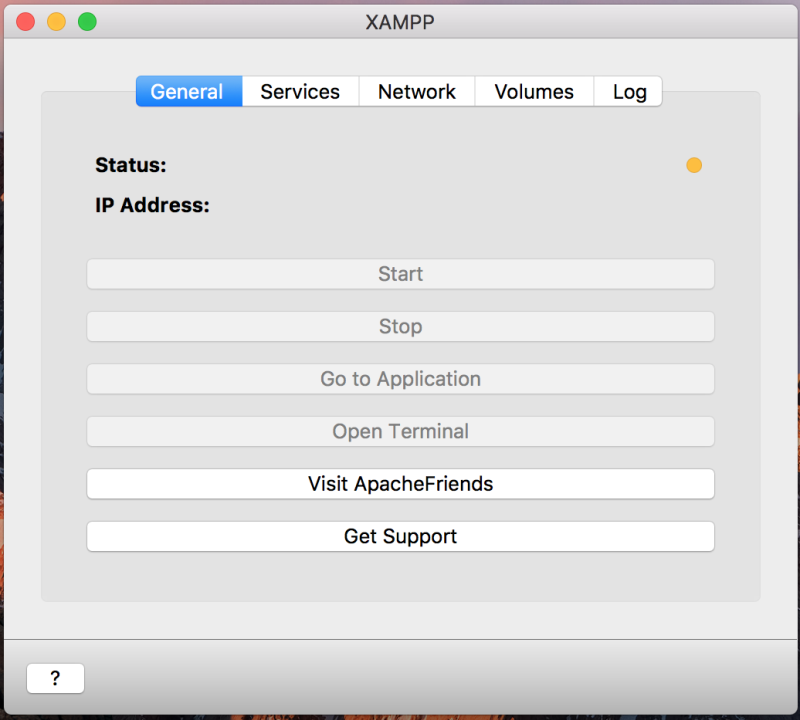
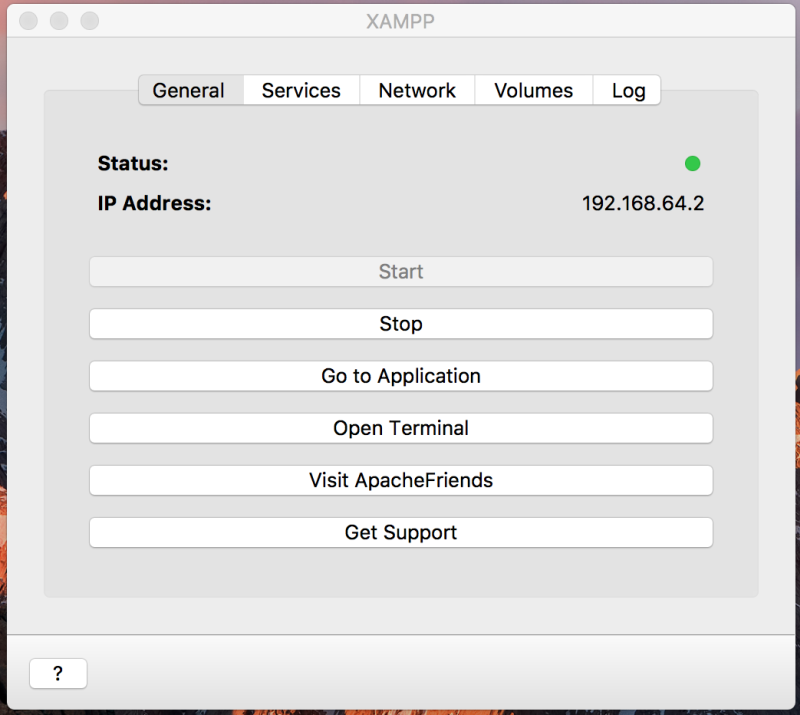
- XAMPP control panel will start. There are 5 tabs (General, Services, Network, Volumes and Logs) in the top. Among which default selective tab is General.
- Click on the Start button in General tab and services will start.
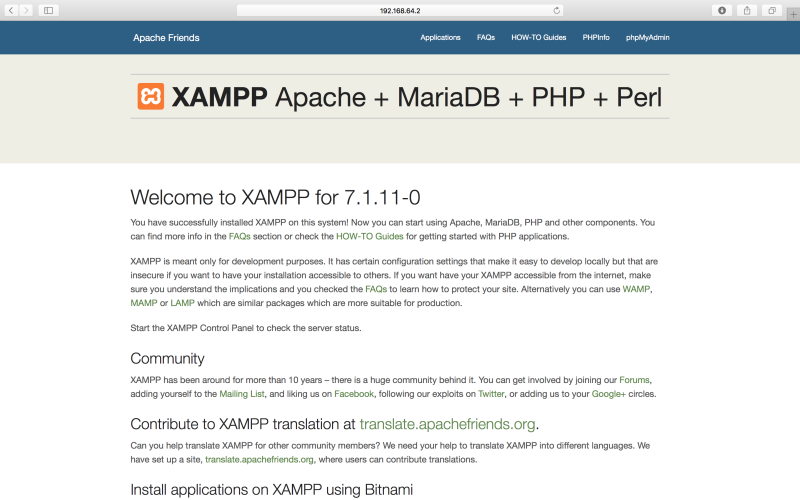
- There will be IP address appears in front of IP Address. Copy this IP and paste into browser address bar and hit enter. You will see the Apache Friends Page.
- Congratulation you have successfully installed and run XAMPP.
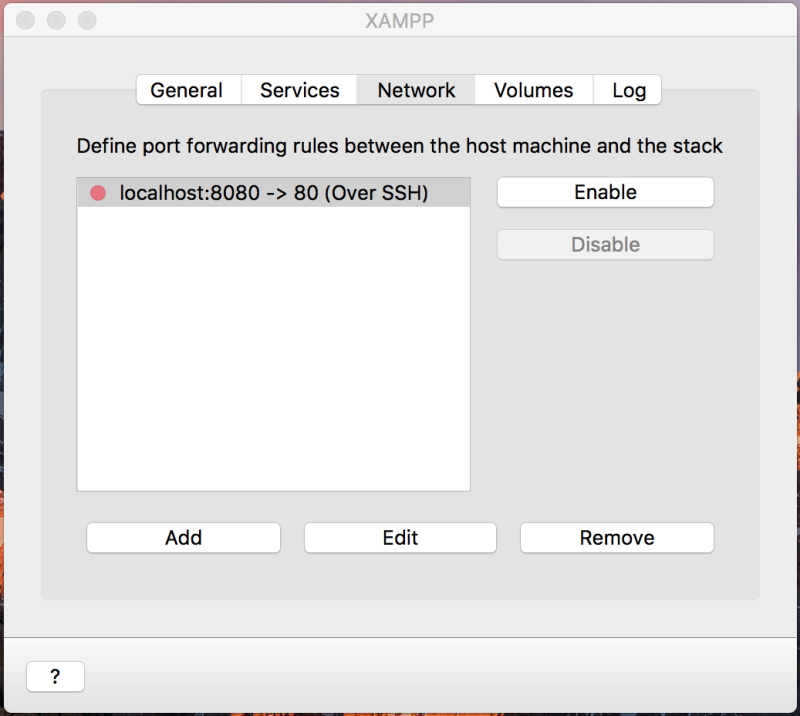
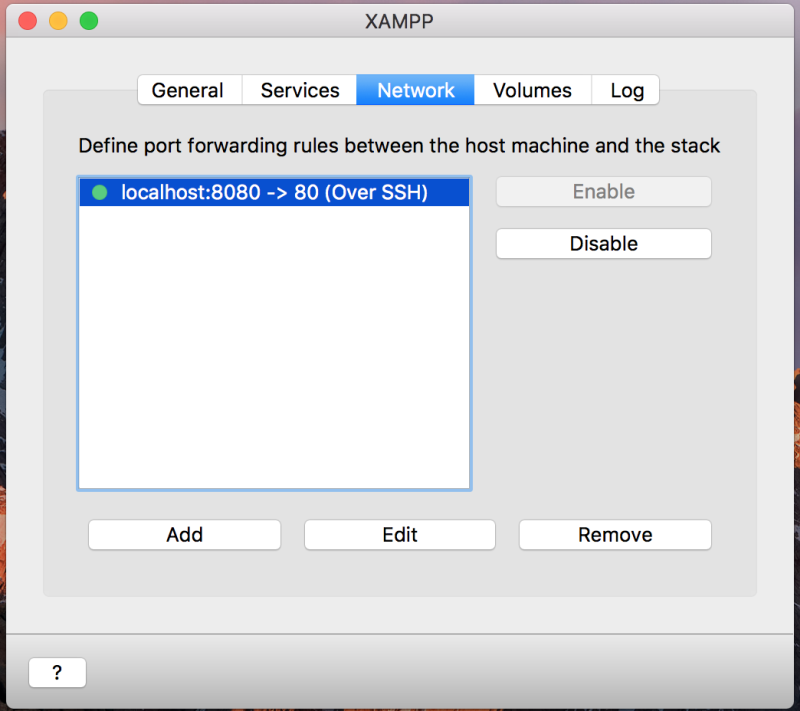
- But if you want to run xampp as a localhost then go to Network tab and Enable localhost:8080
- After click on Enable go to the browser and type
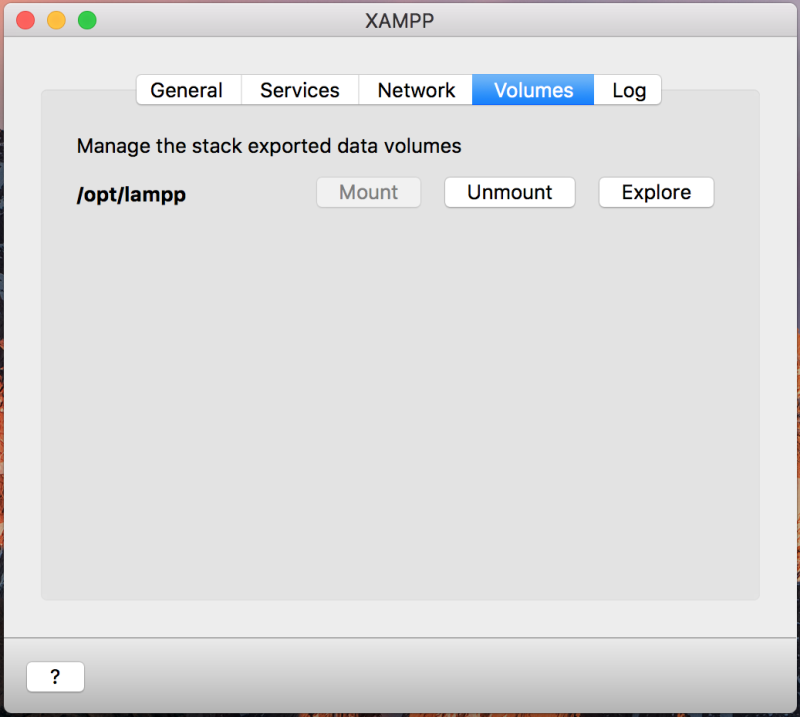
localhost:8080you will see default XAMPP page. - For XAMPP folder path click on Volumes tab. In this tab you can mount
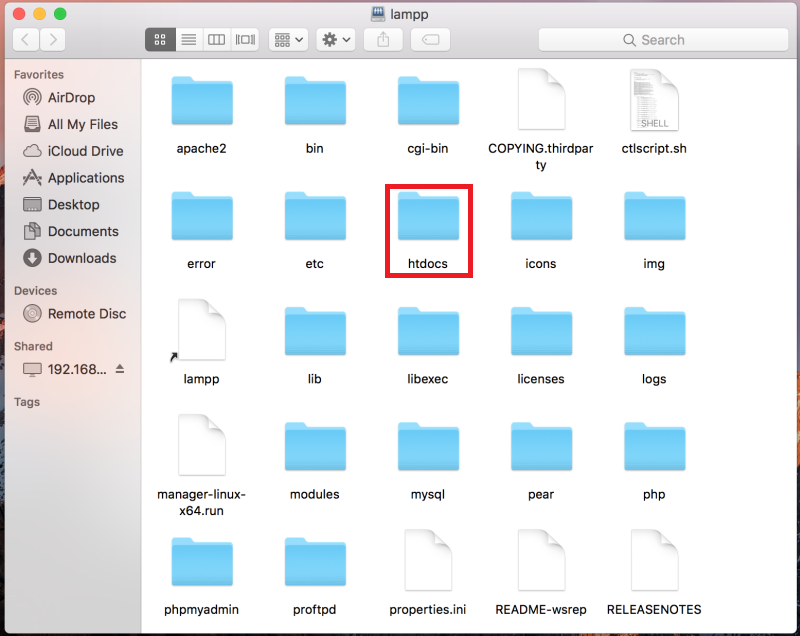
/opt/lamppfolder to the xampp. Right now there are 3 buttons Mount, Unmount and Explore respectively and all are disable. Click on the Mount button and it will enable explore button. Now click on the explore button and it will take you to the xampp folder. There is a htdocs folder, you will put all of your PHP projects and script inhtdocsdirectory. If you want to access particular projects or script in the browser. Just go to the browser and typelocalhost:8080/scriptnameand script will open.
Also Read: Insert data in Mysql using Php Form
For your convenience I took the step by step screenshots of above points which you will see in below.
Step 1:

Step 2:
Step 3:
Step 4:
Step 5:

Step 6:
Step 7:
Step 8:
Step 9:
Step 10:
Step 11:
Step 12:
Also Read: How to fetch data from Mysql using PHP
More from WDB24.com
 Create dynamic Mysql Insert Query Function in PHP using MYSQLi OOP
- How to install Laragon on Windows 10
 Check and Uncheck all Checkbox using jQuery
- How to display data from database in PHP using Ajax and JSON
 How to add Multiple File Upload Input using jQuery
 How to install Composer on Windows with XAMPP
 Codeigniter Form Validation Tutorial Example – with error message and callback
 How to Add Custom Sidebar in Wordpress
How do I manage to access my script by only typing: localhost/myapp/ instead of: localhost:8080/myapp/ ?