WordPress is the most popular CMS on the web. About 27% of the web uses WordPress. In this tutorial I am going to download and install wordpress in my windows machine using xampp.
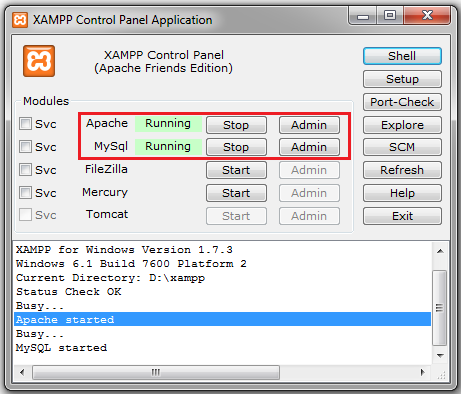
Step 1: Start Apache and Mysql Services in XAMPP
I am assuming that you people already downloadeded XAMPP and it is running on your Local Machine/PC. If you don’t know how to install xampp on local machine check Xampp installation post.
Step 2: Download WordPress
Make sure that Apache and Mysql are running when you are going to install wordpress on local machine. Next step is to download wordpress latest version from wordpress.org site.
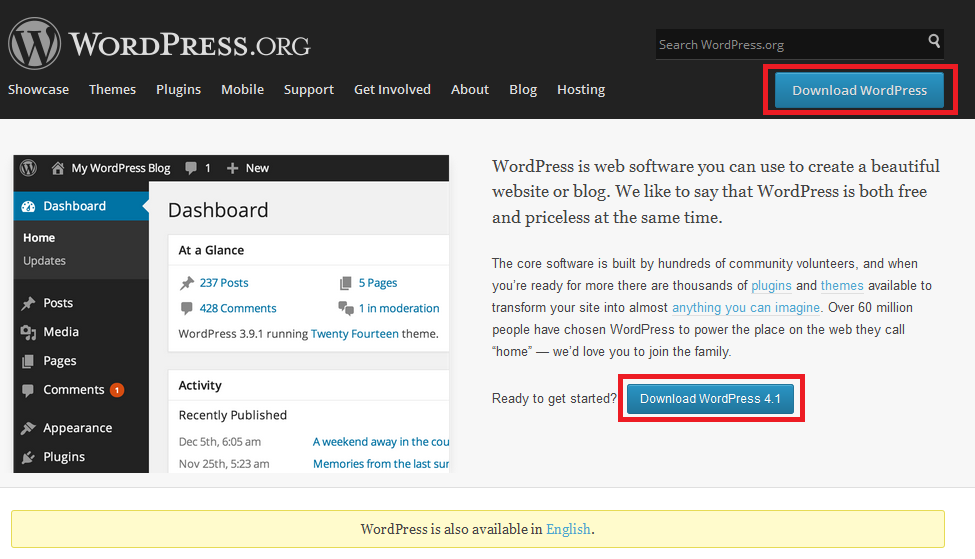
After landing on wordpress site there are two buttons having Download WordPress text. Click any one of them and it will bring you to the next page from where you can download your latest wordpress zip file. See below image
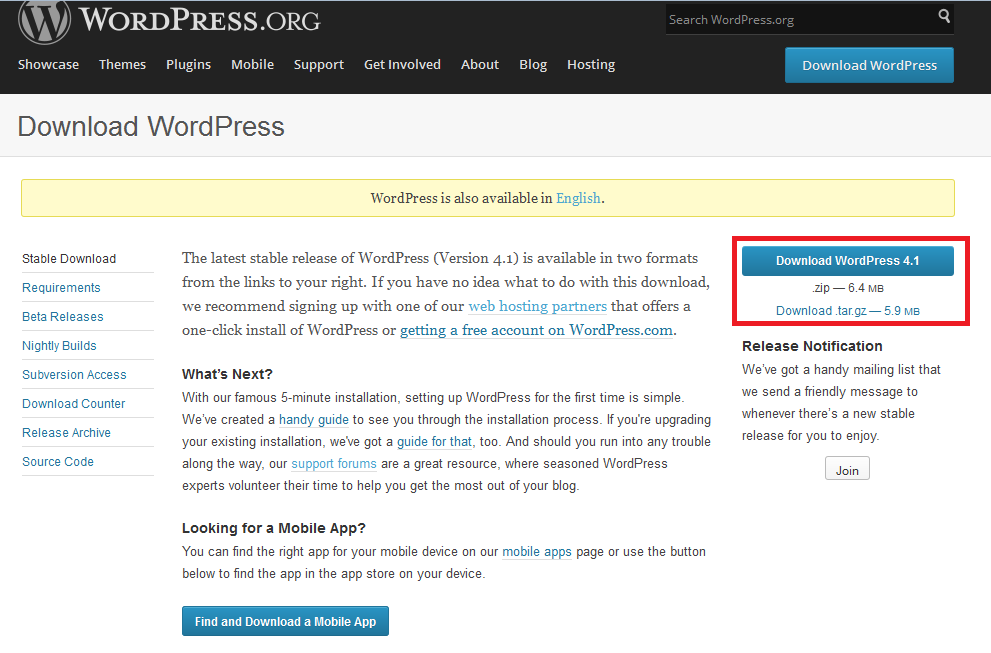
If you want to download .tar.gz version of wordpress then you can click on download.tar.gz (see red highlighted area from above image) otherwise click on download wordpress and downloading will be start. Once wordpress downloaded check your downloads folder and copy wordpress.zip to htdocs folder in Xampp.
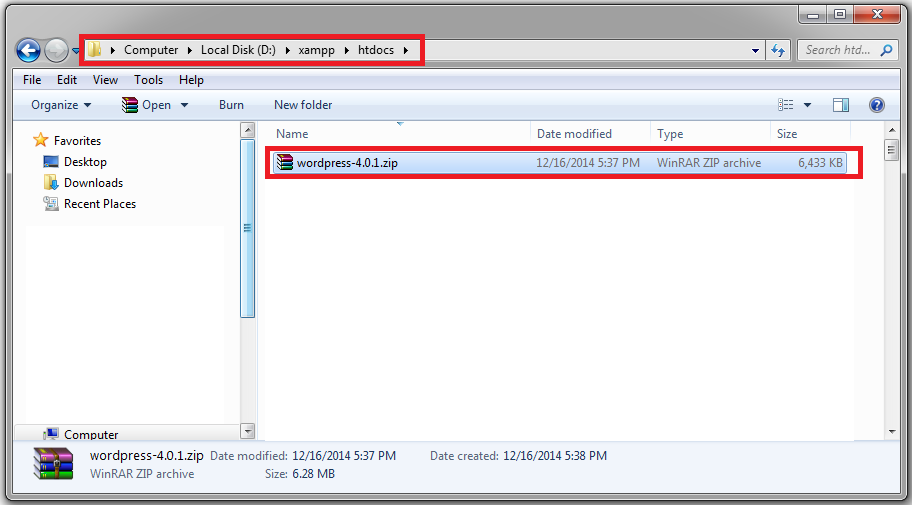
Step 3: Copy and Extract WordPress folder in xampp/htdocs
Once you copy and paste wordpress zip to htdocs folder of xampp then extract this folder. After extraction wordpress folder will create like this.
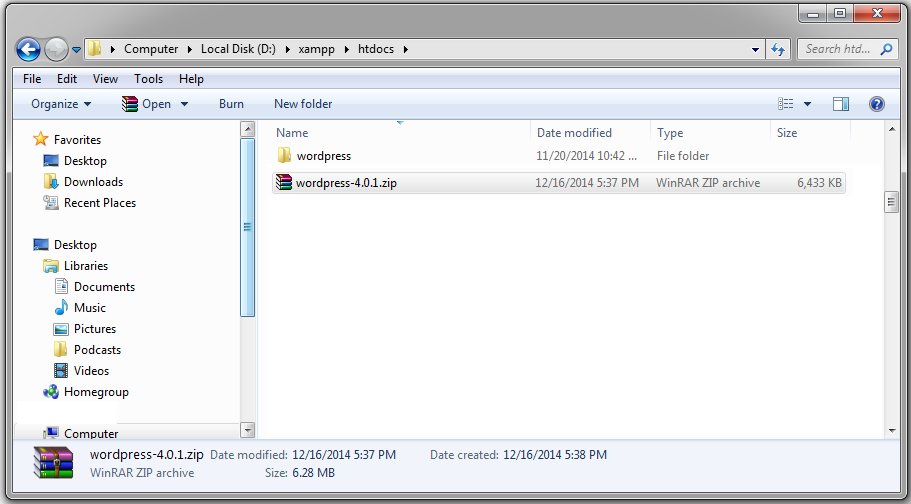
I usually put wordpress.zip file in my htdocs folder because I need that quite frequent. If you want to put wordpress.zip file anywhere on your local machine its totally fine.
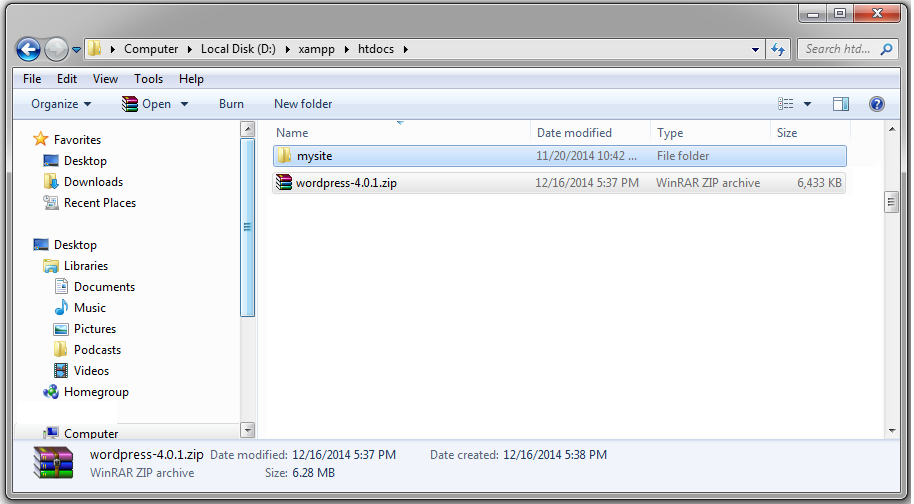
Now change your wordpress folder name to your website or blog name. In this tutorial I have changed wordpress name as mysite.
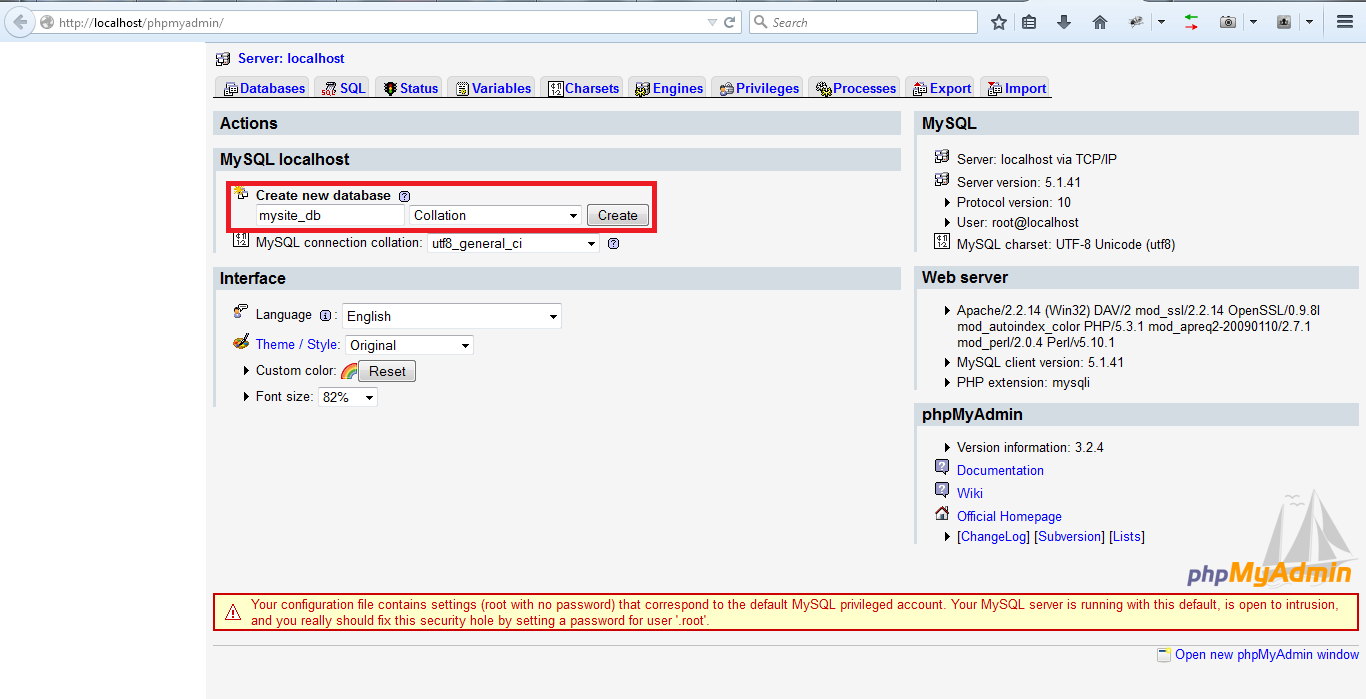
Step 4: Create Database in phpmyadmin
Now goto phpmyadmin (usually http://localhost/phpmyadmin/) and create database. I have created database as mysite_db
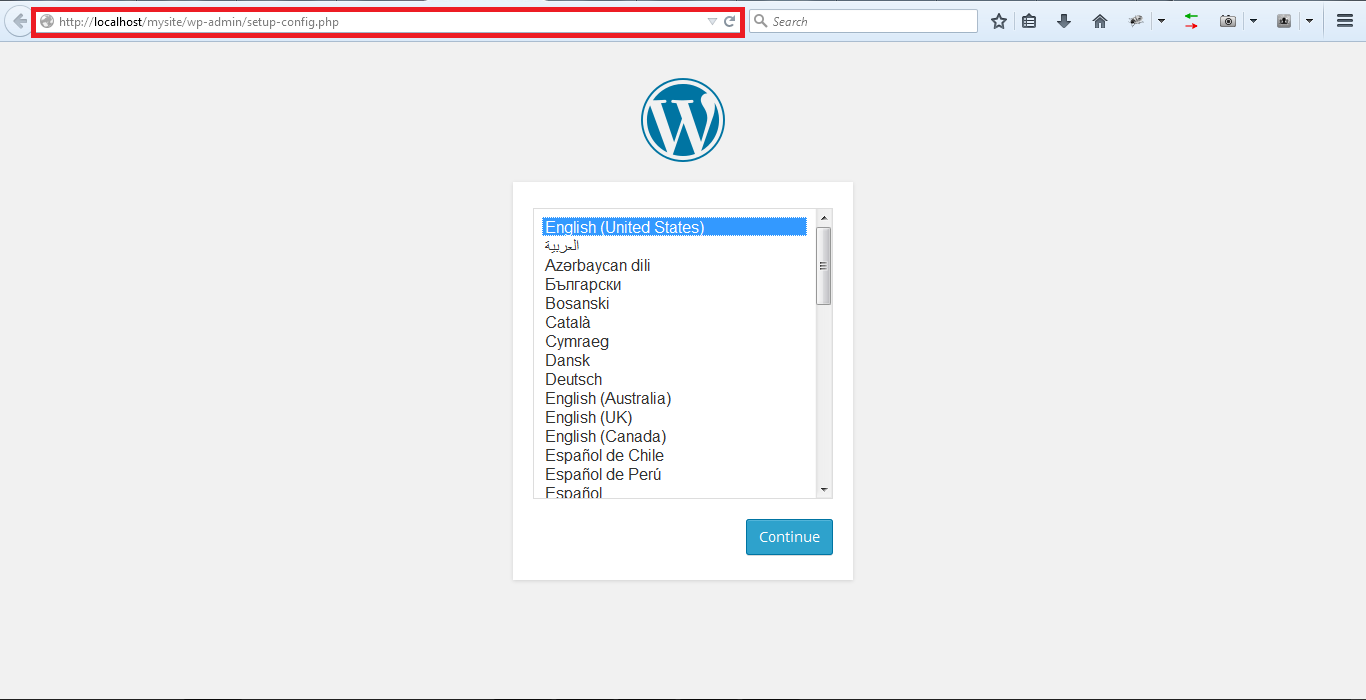
Step 5: WordPress Installation Setup
Once database is created goto your browser and type localhost/mysite remember mysite is a folder name. After hitting localhost/mysite wordpress installation process starts. WordPress come up with bundle of languages so at first it ask about language in which you want to install your wordpress. In my case, I am going to continue with English (United States). You can select your preferred language. See image below.
At next page wordpress setup confirms that you already know database name, database username, database password for that user, database host and table prefix if more than one wordpress is going to install in one database. Usually developers do not create database user and password for localhost. Default user name for phpmyadmin is root and password is blank (it must be empty).
You can also put database information directly to wp-config-sample.php (is located in the root of wordPress file directory in my case it is located in htdocs/mysite/wp-config-sample.php) and save this file as wp-config. You can learn more about editing wp-config.php file from Editing Wp Config file

After click on Let’s go next step to fill database info. Add database name, user name, password, database host and table prefix.
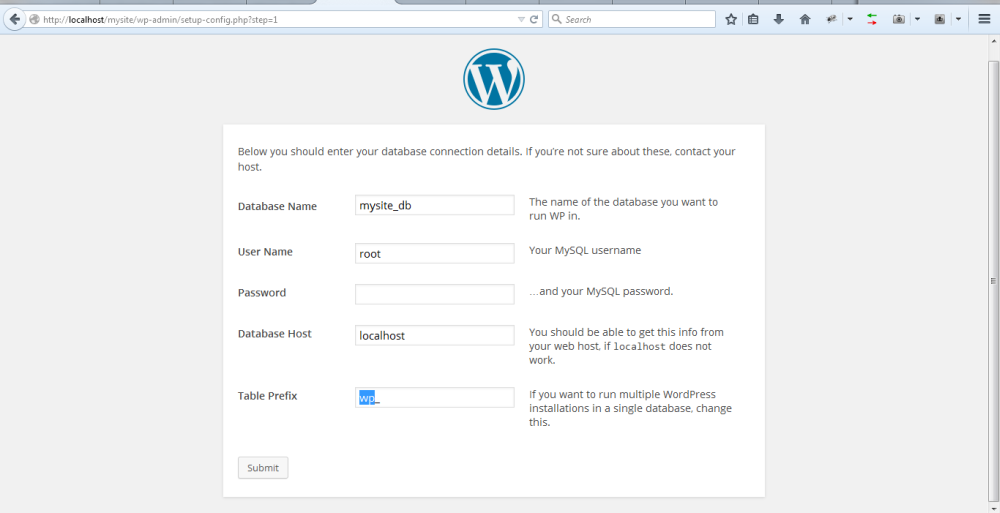
Make sure all the information should correct then click on submit button. If all information is correct it will get you to another page where following message will be showing.
All right, sparky! You’ve made it through this part of the installation. WordPress can now communicate with your database. If you are ready, time now to…
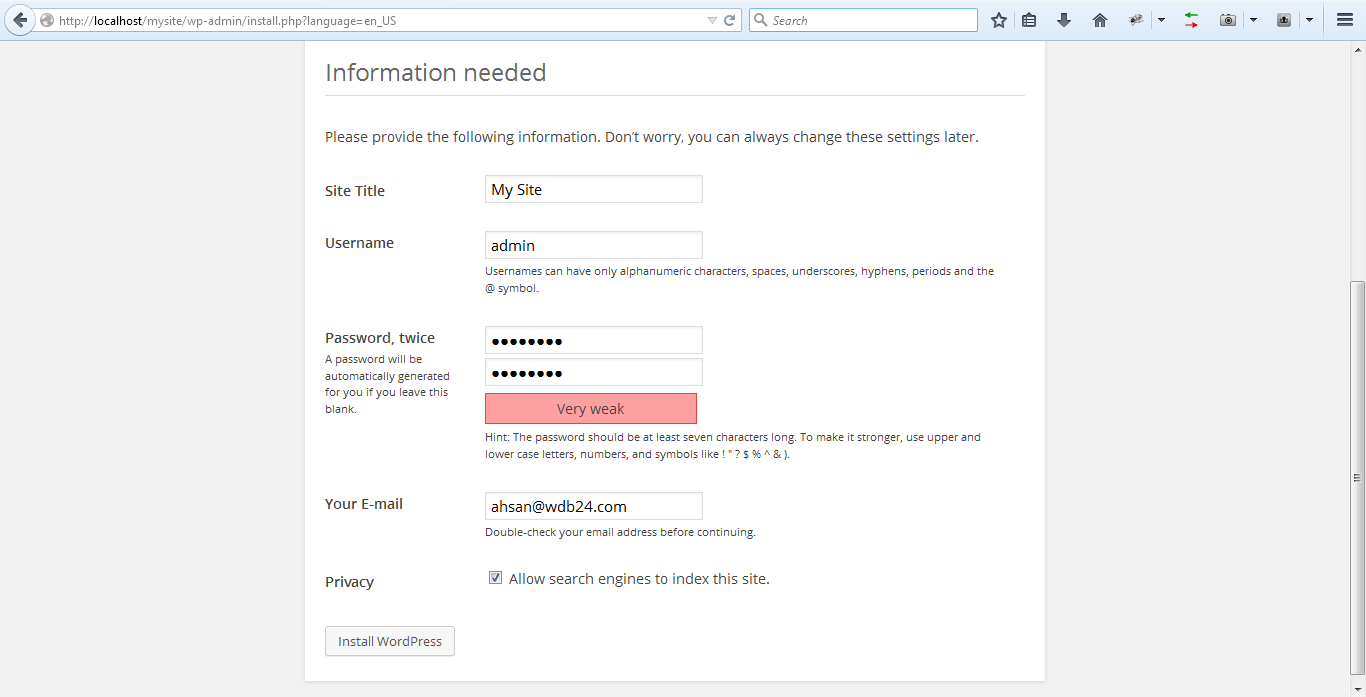
Step 6: Almost done with wordpress installation
Click on Run the Install button that is showing after above message and you are almost done with wordpress installation. Now you need to add site title, admin user name and password, email address and privacy check for search engine bots.
Step 7: All Done
Fill all the fields and hit Install WordPress button and your wordpress is ready to work on windows using xampp. You can access your wordpress frontend and backend by following urls. Once again remember mysite is a folder name.
for frontend: localhost/mysite/
for wordpress admin: localhost/mysite/wp-admin
More from WDB24.com
 How to create simple jQuery text accordion
 Jquery Ajax Dropdown (onchange) Example in PHP
- Retrieve data from database and display in php form
 PHP PDO Tutorial for Beginners with Example – Part 1
 Laravel Tutorial for beginners – Let’s Understand Directory Structure
- Create dynamic Mysql Insert Query Function in PHP using MYSQLi OOP
 Simple Codeigniter Pagination Example
 How to Add Custom Sidebar in Wordpress